
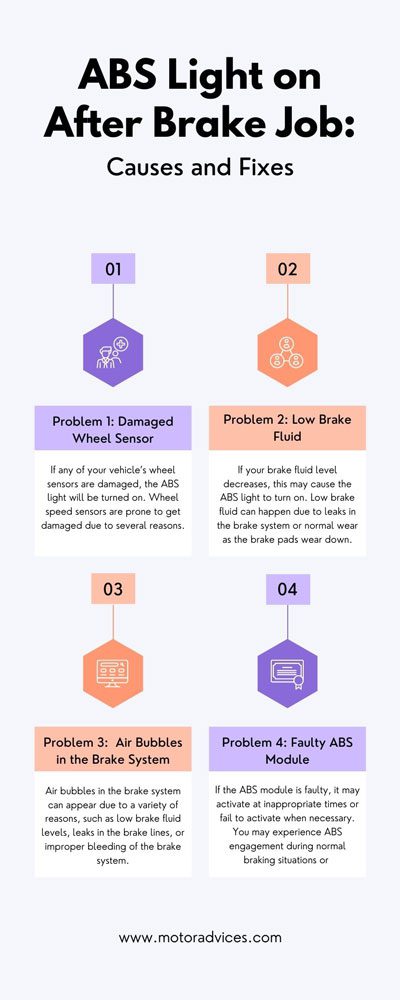
ABS Light on After Brake Job: A Comprehensive Walkthrough
The presence of a lit ABS light after a brake service can be troubling for car owners. The unexpected ABS light appearance can raise concerns about repair or maintenance effectiveness. Understanding the potential causes behind this issue is essential to ensure the proper functioning of the Anti-lock Braking System.
So, why does the ABS light on after the brake job? Well, there are a couple of reasons that can cause this. These include the following.
- Damaged wheel sensors
- Low brake fluid levels
- Air bubbles in the brake system
- Malfunctioned ABS module.
You may need to replace the wheel sensor, add brake fluid, or replace the ABS module. In this study, we will explore the reasons why the ABS light may remain on after a brake job. We will guide you through the possible troubleshooting steps and solutions to help you address this situation effectively.

ABS Light on After Brake Job: Causes and Fixes
As we already know the causes of this problem, we will now dig into an in-depth look at the problems and solutions for each of them. So, let’s get started!
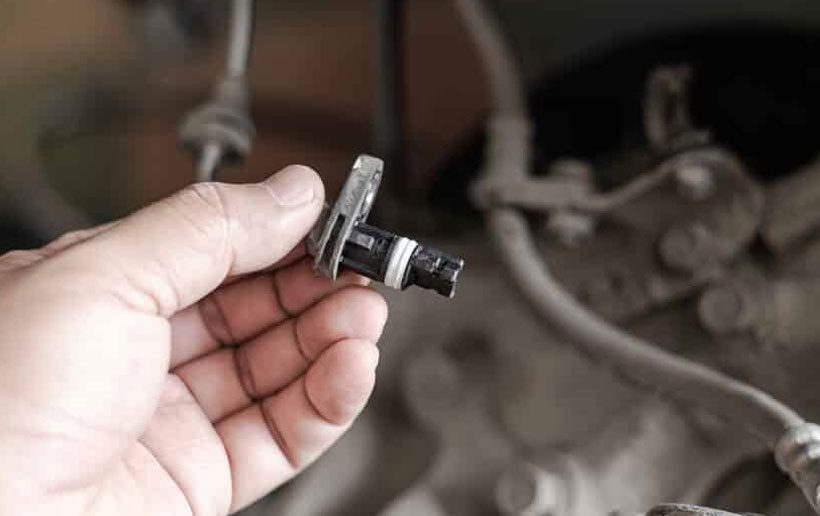
Problem 1: Damaged Wheel Sensor
If any of your vehicle’s wheel sensors are damaged, the ABS light will be turned on. Wheel speed sensors are prone to get damaged due to several reasons. These are including
- Wear and tear
- Exposure to weather elements
- Corrosion and debris buildup on the sensor tip.
Additionally, the cable and wiring attached to the sensor can also experience damage due to harsh driving conditions and exposure.
Symptoms of a damaged wheel speed sensor may include the following, along with the ABS light on.
- The traction control light stays on
- Uneven braking or excessive stopping distance
- Loss of stability control or traction control
- Difficulty shifting gears in an automatic transmission vehicle
Potential Fix:
In this case, repairing or replacing the wheel sensor can be beneficial. Go through the following steps to do so.
- Step 1- Remove the wheel: To access the wheel sensor, the wheel will need to be removed.
- Step 2- Inspect the sensor: Check the sensor for any signs of physical damage, such as cracks, rust, or loose connections. If the damage is minor, the sensor may be able to be repaired. Otherwise, it may need to be replaced.
- Step 3- Check the sensor wiring: Ensure that the wiring leading to the sensor is not damaged or disconnected. If there is damage, repair the wiring before replacing the sensor.
- Step 4- Replace or reinstall the sensor: If the sensor cannot be repaired, a new one will need to be installed. If the sensor was simply loose, it may be able to be reinstalled into place.
- Step 5- Reinstall the wheel: Once the sensor has been fixed or replaced, the wheel can be reinstalled.
- Step 6- Clear the ABS codes: Use an ABS code reader or OBD-II scanner to clear the codes related to the ABS. This will turn off the ABS light and reset the system.
A broken wheel sensor may be replaced for a reasonable price. Parts might cost up to $400, and labor can cost up to $80 per hour. At the highest rate, it can cost approximately $500.
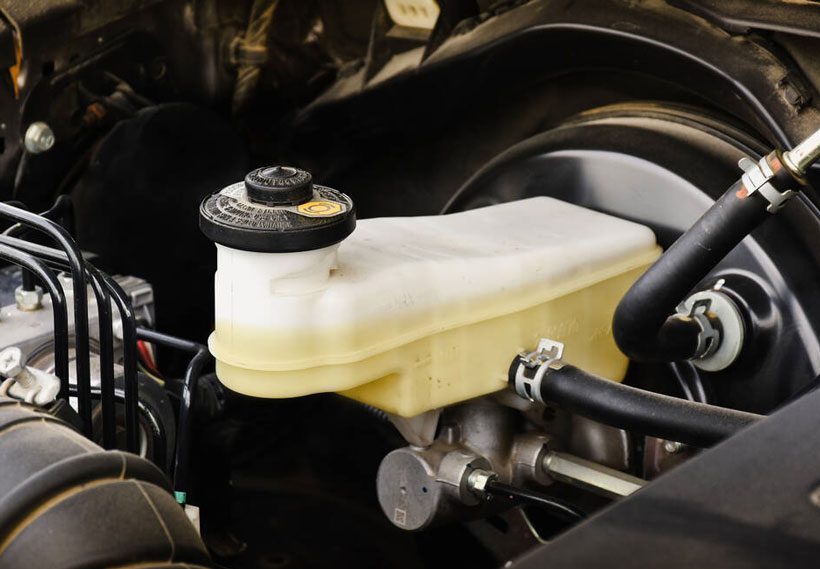
Problem 2: Low Brake Fluid
If your brake fluid level decreases, this may cause the ABS light to turn on. Low brake fluid can happen due to leaks in the brake system or normal wear as the brake pads wear down. Symptoms of low brake fluid include the following.
- A spongy brake pedal
- Difficulty stopping the vehicle
- Increased stopping time
- Increased risk of brake failure
Additionally, an illuminated brake warning light on the dashboard may be an indication of low brake fluid. It’s important to address low brake fluid quickly by topping up the fluid level.
Also, having the brake system inspected by a professional can help to prevent potential accidents and damage.
Potential Fix:
If the cause of the ABS light coming on after a brake job is identified as low brake fluid, here are the steps to fix the issue:
- Step 1: The master cylinder reservoir contains the brake fluid, which is responsible for transferring force from the brake pedal to the brakes themselves.
- Step 2: Identify the source of the leak by inspecting the brake system. Inspect and replace damaged steel brake lines and hoses if necessary. Contacting a professional is recommended to do all these.
- Step 3: Look at the side of the master cylinder reservoir to see if the fluid level is between the minimum and maximum marks. If the level is low, it is a sign that the brake pads are worn out and need to be replaced.
- Step 4: If the brake fluid level is low, use a funnel to add brake fluid to the reservoir until it reaches the maximum level. Make sure to use the type of brake fluid specified in the owner’s manual.
- Step 5: If you had to add brake fluid, then you’ll need to bleed the brake system. This involves opening the bleed valves on the brake calipers to allow any air that’s been trapped in the brake lines to escape.
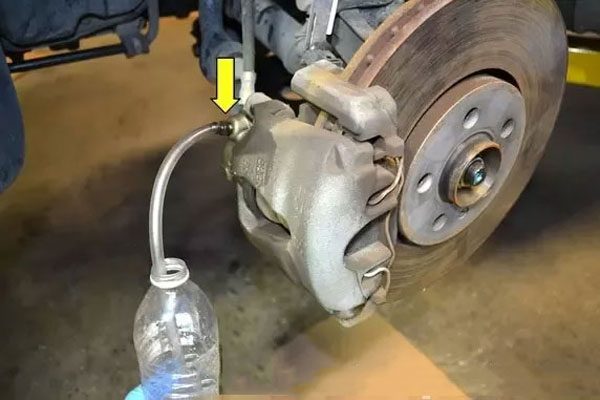
Problem 3: Air Bubbles in the Brake System
Air bubbles in the brake system can appear due to a variety of reasons, such as low brake fluid levels, leaks in the brake lines, or improper bleeding of the brake system. If the issue is not addressed promptly, it can lead to complete brake failure and increase the risk of accidents.
Potential Fix:
You may remove the air bubbles in your braking system by following the steps below:
- Step 1: Ensure that the brake fluid reservoir is filled with an adequate amount of fluid. Use the recommended type of brake fluid specified in your vehicle’s manual.
- Step 2: Identify the brake calipers on each wheel and locate the brake bleeder valve. These valves are usually located on the calipers themselves.
- Step 3: Gather a box-end wrench and a transparent plastic hose that fits securely over the bleeder valve.
- Step 4: Attach the plastic hose to the bleeder valve and open it by turning it counterclockwise a quarter turn. This will allow the air trapped in the system to escape through the hose.
- Step 5: Have someone else slowly pump the brake pedal a few times and then hold it down. This action helps build pressure in the system and forces the air bubbles to move toward the bleeder valve.
- Step 6: Repeat this process for all four wheels, starting with the wheel farthest from the master cylinder and moving inward. This ensures that all the air bubbles are eliminated from the entire brake system.
If you are unsure about bleeding the brakes yourself, consult a professional mechanic. They can charge up to $100.
Finally, throughout the bleeding process, periodically check the brake fluid level in the reservoir. Ensure that it remains above the minimum level to avoid introducing more air into the system.
Problem 4: Faulty ABS Module
If the ABS module is faulty, it may activate at inappropriate times or fail to activate when necessary. You may experience ABS engagement during normal braking situations or a complete lack of ABS engagement during slippery or emergency braking situations.
Also, it may produce strange noises or vibrations during braking. This can include grinding, buzzing, or vibration coming from the wheels or from the ABS module.

Potential Fix:
In this case, replacing the ABS module should be done. Follow the steps below to install a new ABS module.
- Step 1- Gather all the necessary tools and Disconnect the Battery: Before you begin, you will need to gather all the necessary tools, such as a wrench, socket set, pliers, and a new ABS module.
To ensure your safety, disconnect the battery and wait for a few minutes before continuing.
- Step 2- Locate the ABS module: The ABS module is typically located near the master cylinder or in the engine compartment. However, it can also be located in other areas depending on the make and model of the vehicle.
- Step 3- Remove the old ABS module: Use a wrench or socket set to remove the bolts or screws that secure the old module to the vehicle. You may need to use pliers to remove any clips or connectors that hold the module in place.
- Step 4- Install the new ABS module: Position the new module in place, and reattach the bolts, screws, clips, and connectors. Make sure all connections are tight and secure.
- Step 5- Bleed the brake system: After installing the new ABS module, you will need to bleed the brake system. It will ensure that no air bubbles are entered during the installation process.
According to some resources, the cost of replacing the ABS module can be up to $1400 now. Including labor costs, which can be more or less a little than $150. Parts are quite expensive here, can be around $1200.
If you’re experiencing the ABS light staying on after a brake job and would like more information, you may find our article on ABS light on after a tire change helpful. It discusses potential causes for the ABS light to remain illuminated after a tire change and provides troubleshooting suggestions. Additionally, if you’re dealing with both the ABS and brake lights being on, our article on ABS and brake light on offers insights into the possible reasons and recommended actions to address the issue. These resources can assist you in understanding and resolving the ABS light-related concerns you may be facing.FAQs
Don’t go away! There’s something more to learn about ABS light on after the brake job.
A: It is recommended to check the brake fluid level at least once every few months or as specified in your vehicle’s owner’s manual. Additionally, it’s a good practice to inspect the brake fluid whenever you perform other maintenance tasks, such as oil changes.
It is generally safe to drive with the ABS light illuminated, but it is important to address the underlying issue as soon as possible. However, keep in mind that without the ABS functioning, your vehicle’s braking performance may be declined, especially in emergencies.
Final Words
In summary, the presence of a lit ABS light on after the brake job can be a cause for concern. Understanding the potential causes and having knowledge of the appropriate solutions is crucial to ensuring the proper functioning of the Anti-lock Braking System.
In this discussion, we explored the various reasons for the ABS light remaining on and provided step-by-step solutions for each issue. By addressing the problems mentioned above, you can effectively resolve the ABS light issue and ensure safety and performance.
Regular maintenance and prompt attention to any ABS-related concerns are key to maintaining optimal brake performance. Remember to consult your vehicle’s owner’s manual and seek professional assistance when necessary. Drive safely!