
4runner Brake Light Not Working [ 5 Common Problems And Solutions]
As a Totoya 4Runner owner, you may be related to offroading occasionally. And for such a heavy vehicle and rough driving conditions, good braking systems are necessary! Likewise, small issues like brake light malfunction may lead to serious accidents!
So why is the 4runner brake light not working? It may not work for multiple reasons, such as dirty bulb sockets, blown-out bulbs, blown fuse, or faulty brake light switches. Additionally, faulty wires can also cause this issue.
However, to fix the problem completely, you need to have an in-depth idea of these causes. And here, we’ll go into detail about all the ins and outs of the problems and provide you with a DIY solution in this article.
Table: 5 Common Problems And Solution Of 4runner Brake Light Not Working

Before we dive into details, let’s take a glance at the common problems and their quick resolutions!
| Problems | Solutions |
|---|---|
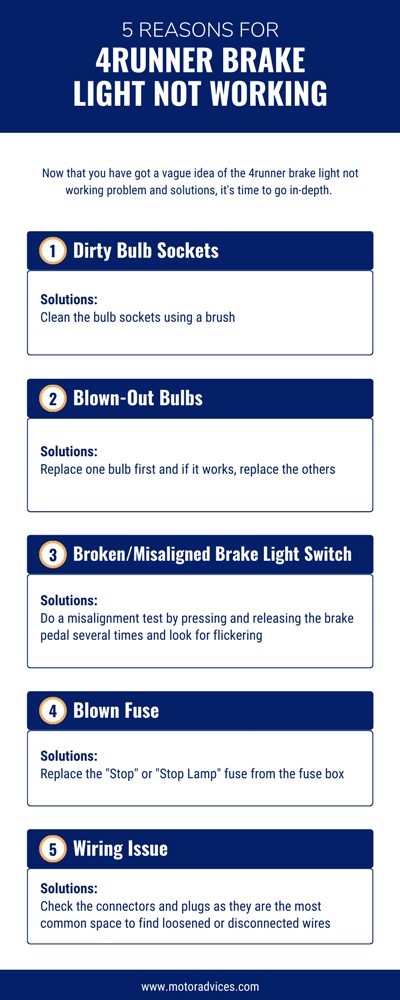
| Dirty Bulb Sockets | Clean the bulb sockets using a brush |
| Blown-Out Bulbs | Replace one bulb first and if it works, replace the others |
| Broken/Misaligned Brake Light Switch | Do a misalignment test by pressing and releasing the brake pedal several times and look for flickering |
| Replace the broken brake light switch | |
| Blown Fuse | Replace the “Stop” or “Stop Lamp” fuse from the fuse box |
| Wiring Issue | Check the connectors and plugs as they are the most common space to find loosened or disconnected wires |
| Check the wires using a multimeter and replace the faulty one |
5 Reasons For 4runner Brake Light Not Working [How To Fix Them?]
Now that you have got a vague idea of the 4runner brake light not working problem and solutions, it’s time to go in-depth.
1. Dirty Bulb Sockets
The bulb socket is the electrical connection point between the brake light bulb and the vehicle’s wiring system. As a result, any buildup of dirt on the bulb sockets will result in a layer of interference. And that will prevent the lights from establishing an electrical connection.
Similarly, dirt can prevent proper grounding of the bulb socket, which is vital for completing the electrical circuit.

Fix
As you can already guess, you need to get rid of the dirt stored in the socket. To do that;
- Turn off the vehicle first and open the rear tailgate of your Toyota 4Runner.
- Remove any panel that protects the bulbs from getting damaged.
- Now, you must remove the bulbs, which may be challenging and require some extra force to twist off due to dirt buildup.
- Rotate the bulbs anti-clockwise from the socket to pull the bulbs out.
- With the bulbs removed, clean the sockets using a brush of appropriate size while being cautious.
Don’t close the tailgate and reinstall the panels because you will need to open them again for another problem mentioned below.
2. Blown-Out Bulbs
Over time, bulbs tend to blow out due to overload, short circuits, or water getting inside the bulbs. All of the bulbs are connected to the same circuit; thus, everything that happens to one bulb also affects the others.
There are plenty of ways a bulb gets blown out as it is quite sensitive, which is common.

Fix
The solution here is to replace the blown-out bulbs with new ones. If you have followed up with the last issue, the bulbs should be within reach. In case you skipped it, here’s how to access the bulbs and make the necessary replacement;
- Turn off the vehicle first and open the rear tailgate of your Toyota 4Runner.
- Remove any panel that protects the bulbs from getting damaged.
- Take out the bulbs by twisting the bulb anti-clockwise from the socket.
- Visually inspect the bulbs for any wear and tear. Blown bulbs generally have a visible break or gap in the filament inside the bulb.
- Replace the bulb if broken and if it works, replace all the other bulbs in the brake light system.
3. Broken/Misaligned Brake Light Switch
The brake light switch transmits the signal that you depressed the brake pedal to the brake light, causing the brake lights to illuminate. Thus, the brake light will undoubtedly not illuminate if the brake light switch has failed.
Well, wear and tear are typically to blame for a broken brake light switch. As you push the brake pedal with consistent pressure, these switches start to deteriorate. Conversely, the same cause could lead to the switch becoming out of alignment.

Fix
Start by looking underneath the dashboard on the driver’s side to find the brake light switch. When you reach the top of the brake pedal arm, follow it up until you spot a little switch connected to it.
To check for misalignment;
- Turn on the engine.
- Press and release the brake pedal several times and look for flickering in the brake lights.
- If flickering is found, the brake light switch is misaligned.
- Turn off the engine before aligning the switch back in place.
- Gently push or pull the switch in the direction needed to align it properly with the brake pedal arm.
On the other hand, you may need to replace the brake light switch if it’s broken. You can check its functionality using a multimeter. Here’s a video that will help you check the switch’s functionality using a multimeter.
4. Blown Fuse
A blown fuse disrupts the flow of electricity to the lights. As a result, the brake lights don’t get the electricity needed to illuminate.
When too much current flows through it, a metal strip or wire that makes up the fuse melts. A fuse stops the circuit when it blows, protecting the electrical system from further harm.

Fix
The solution is quite simple: you just need to replace the fuse. In a Toyota 4runner, the fuse box is located under the dashboard on the driver’s side. Here’s the replacement process once you have got hold of the fuse box;
- Find the fuse named “Stop” or “Stop Lamp”.
- Pull out the fuse.
- Visually inspect the fuse and search for signs such as blown filament or darkened appearance.
- If one of the signs is present, the fuse is blown and a new fuse of the same rating needs to be inserted.
5. Wiring Issue
This is one of the most complicated problems comparatively. As you already know, brake lights are connected to wires that go into different places. Overall, the wires are responsible for conducting electricity and then transmitting it to the components.
However, wires tend to get frayed or corroded after extended use. As a result, the brake lights don’t receive any electricity to function.

Fix
Since you need to locate the source of the frayed wire to remedy this, we classified it as a complicated problem. Here’s how you can do it;
- Find the wires that are connected to the brake lights and move along with where the wires go.
- Visually inspect the wires for any signs of damage, such as fraying, cuts, or burns.
- If any wire seems visually suspicious of being damaged, confirm it with a multimeter.
- Set the multimeter to measure resistance (ohms).
- Start by disconnecting both ends of the wire and placing one probe on each end. If there is no continuity (infinite resistance), it indicates a break in the wire.
- Replace the damaged wires from the source.
- Check connectors and plugs as this is the primary place where wires tend to get loosened or disconnected.
FAQs
Let’s check out some commonly asked questions regarding the 4runner brake light not working.
Most of the problems can be easily fixed unless it’s the wiring issue. In case of a wiring issue, you need to dig in deep to find the faulty wire, which can be challenging. So, hiring a professional in this case is viable.
The reason behind a faulty brake light can be anything, so the price range is also versatile. However, a range for fixing it would be around $100 to $400, including labor costs.
For their 4runner vehicles, Toyota does sincerely supply wiring diagrams. It offers thorough service manuals with thorough wiring diagrams for all the systems in their cars. These manuals are frequently offered for sale by accredited Toyota dealerships.
Conclusion
To conclude, there are 5 common reasons behind a 4runner brake light not working. Blown-out bulbs and fuses can easily be fixed by replacement. However, for the brake light switch, you need to check whether it is misaligned or not first and then think about replacement.
On the other hand, you can fix the dirt bulb socket issue just by cleaning the sockets. Lastly, for the wiring issues, you need to dig in deep to find the root wire that is causing the trouble.